
Every grocery store you walk through right now should have fresh cranberries in the produce section, but in another few weeks they will be gone until next holiday season. They are not available fresh year round and now is a great time to take advantage of this tart fruit for enjoying throughout the year! We are not big juice drinkers in this house, but enjoy adding cranberry juice to cocktails and drinking on occasion. Let’s can some cranberry juice to enjoy later this year!
To start gather your ingredients. Prep is important to me and helps make every process smoother…at least in my opinion. I know I’m going to can this juice, so I will get my canning supplies together first: Then I will get my juice prep supplies together: Finally, it’s time to start!

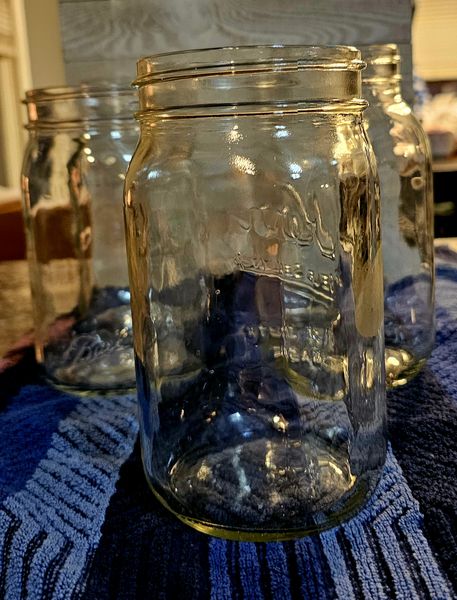
Add your canning pot to the stove, or heat source, filled with water to bring to a boil. I will add my jars to this water so that they are heated slowly with the water and everything is ready to go at the same time. When the water is just at boiling, I will pull the jars to fill and close off the canning pot to continue to heat the water.


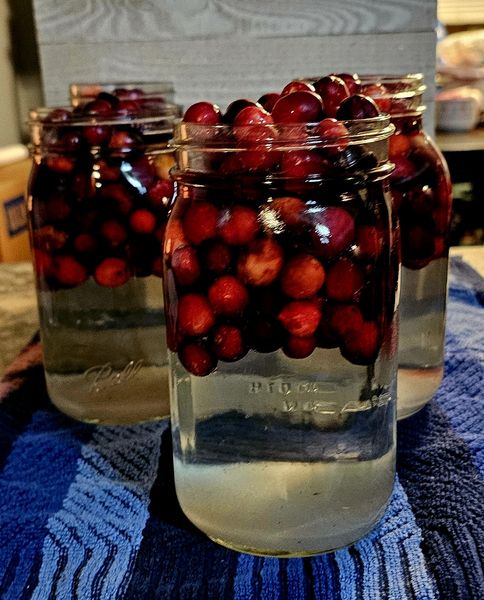
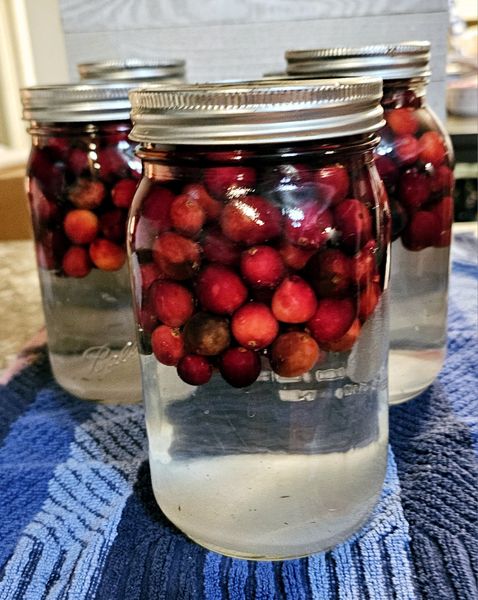
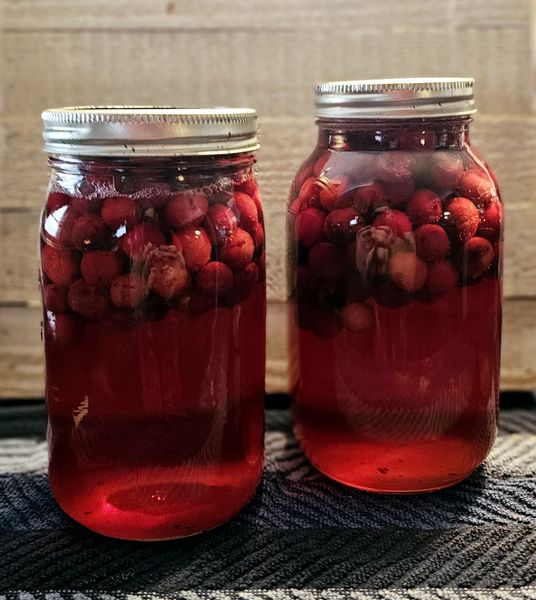
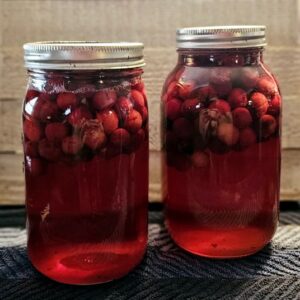
This juice is SO easy to put together! Simply add 1 cup of fresh cranberries to each jar, then sugar and finally the hot water. Make sure to leave at least a half inch of space at the top of the jar. Insert a bubble popper (not a technical term) into the jar in several places to knock out air bubbles that may be hiding in your jars and wipe the rims clean and dry. Add a lid and seal before placing back into the canning pot and make sure it is finger tight.
Process these jars in a water bath canner for 25-30 minutes. After the time has passed, pull jars and place on a towel, out of the way, for at least 24 hours. You may hear popping sounds, which is fantastic! Before storing your juice, check the top of your jars for proper sealing. Remove the bands to use again and store the jars with just the seal for 12-18 months in a cool and dry place. We have a room in our basement that we keep our excess pantry items in because it is cool year round.


We hope you enjoyed this recipe and feel good about making it yourself! Check the notes on the recipe card for ways to adjust your recipe to your liking and to make the canning process easier for you. Have questions on anything you read today? Don’t be afraid to ask, I love to help! You will see links throughout my posts. As an Amazon Associate I earn from qualifying purchases. As always, thank you for reading and joining us on this journey! Simply, Beth
Cranberry Juice – Canned
Ingredients
- 1 cup Fresh Cranberries
- 1/3 cup Sugar
- hot water
Instructions
- To start, make sure your jars, lids and seals are all clean and sanitized. I like to warm up the water in my canning pot with the jars inside them. This allows them to sanitize the jars and bring the jars slowly up to the heat level needed for canning, without the risk of cracking of a jar from heat exposure. I put the seals and lids in a small pot with water and boil off as well.
- Add 1 cup of fresh cranberries to each jar. Then add in 1/3 cup of sugar (or the amount you'd prefer!). Finally add in hot to boiling water to about 1/2 inch of the top of the jar.
- Make sure to use a canning tool to push out air from sides of jar, and wipe rims of jars dry. Add the seal and ring to each jar and twist shut to finger tightness. Place in canning pot. Make sure water covers the jars (you may need to empty some water if you sanitized your jars in the pot) and replace lid. Once water is boiling, allow jars to process in boiling water for 25-30 minutes.
- Remove jars and place on towel out of the way to cool for at least 24 hours. Check to make sure the jars have sealed and if so, label with date and put away! Able to be stored for at a year to a year and a half.